Purchasing Your Binoculars
When purchasing binoculars, you are choosing something that will, if chosen carefully, work for decades. A poorly chosen cheaper pair will often frustrate you and waste money. It’s worth considering what you want and the advantages of spending a little more money to get a suitable and long-lasting product.
Things to consider when working out what type of binoculars will work best for you:
On a pair of binoculars you will see two numbers separated by an x e.g. 8×42, 10×42, 10×50, 10×25, 7×50, 12×50. The first number gives you the magnification of the binoculars, the second number tells you the diameter (in mm) of the objective lens (the lens furthest away from your eyes. See 10 in Figure 1). Four important things are affected by your choice of magnification and objective lens diameter:
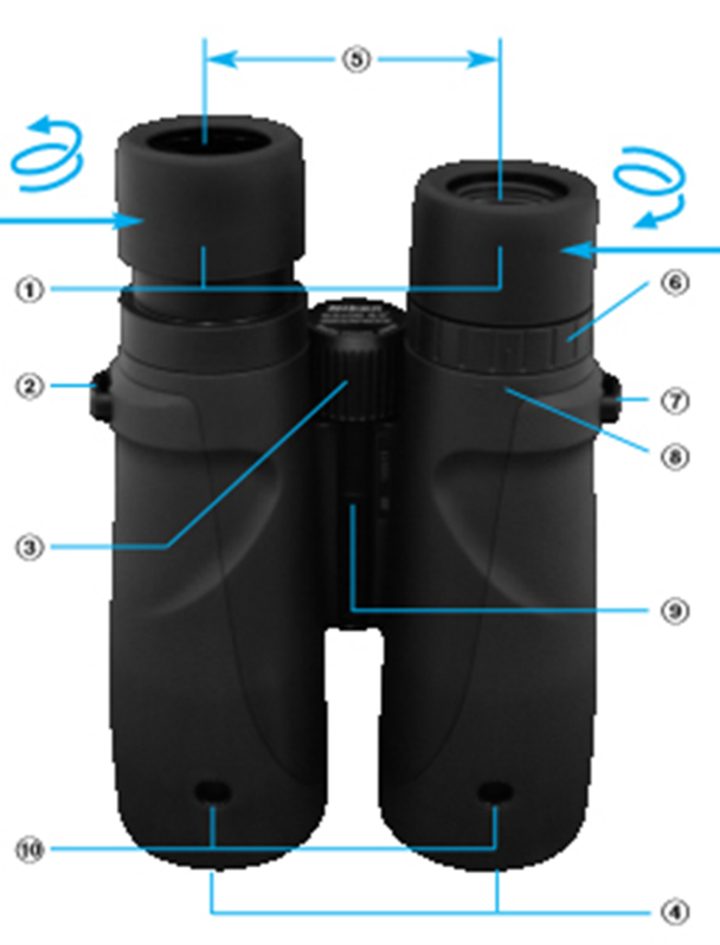
Figure 1: Parts of a pair of binoculars – 1. Eye cups, 2. Strap attachment, 3. Central focus knob, 4. 5. Inter-pupil distance, 6. Diopter control ring, 7. Strap attachment, 8. Diopter reference, 9. Hinge pivot point, 10. Objective lenses
Magnification: choosing the best magnification is always a compromise. The higher the magnification the closer the object you want to see, but there are costs:
Many birders use 10x binoculars as with the higher magnification you get closer to the bird and you can see more detail. But, if any of the above points is important for you it might be better to buy either 8x or even 7x binoculars.
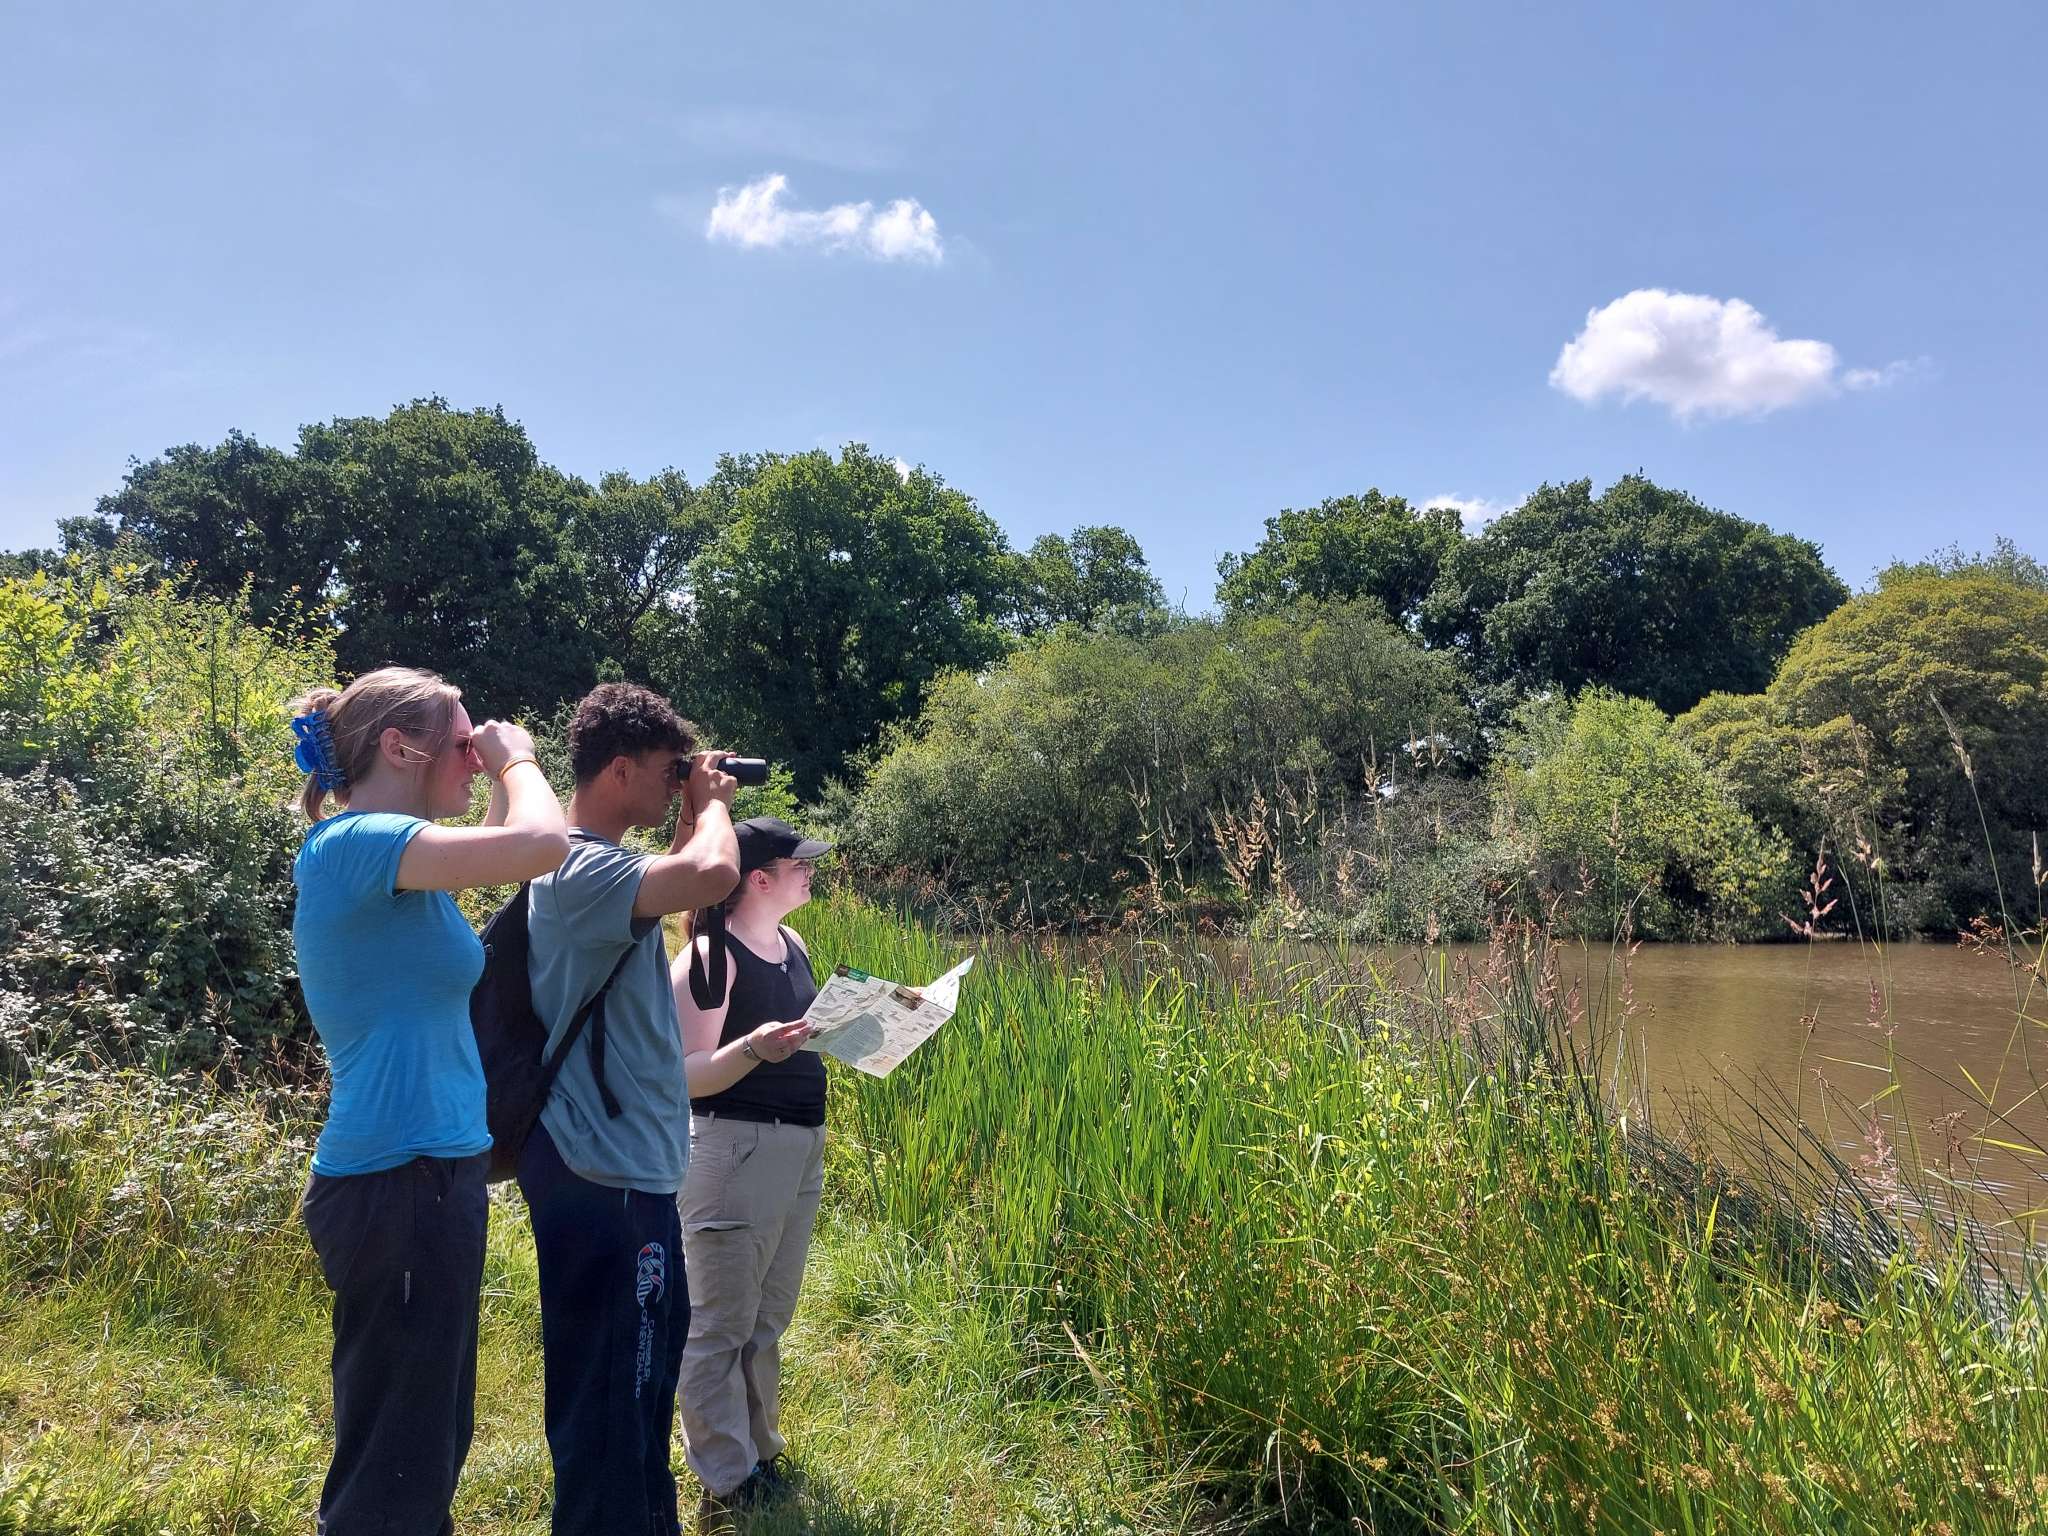
Photo by Fran Anderson
Objective lens diameter (the second number after magnification): the wider the objective lens, then more light is entering your binoculars. This means the diameter of the column of light leaving the binoculars and entering your eyes is wider, and brighter.
The objective lens diameter combined with the quality of lens and prism coatings, determines the amount of light gathered to form an image. If you are regularly observing in poor light conditions, such as early dawn or dusk, or in forested areas, you may need a larger objective lens. But large-diameter objective lenses make binoculars heavier, so 50 mm is the general limit for handheld use.
As you look through your binoculars the size of your pupils is automatically adjusted to get the right amount of light projected onto your retina. If the brightness of the object you are looking at decreases, then the amount of light entering your binoculars also decreases, but then the size of your pupil can increase to compensate. When this happens the brightness of what you are seeing through the binoculars stays the same. This works until the size of your pupil gets larger than the set diameter of the column of light entering your eyes.
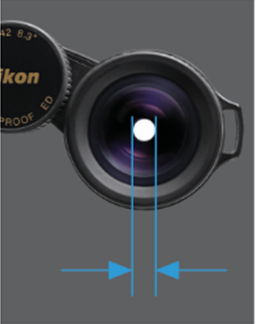
Figure 2: Exit pupil diameter
Light levels: If you divide the objective lens diameter by the magnification this gives you the diameter of the column of light entering your eye (Figure 2). E.g. for the 10×50 binoculars 50÷10=5 mm. This is called the exit pupil diameter. The exit pupil is the bright circle that can be seen in the centre of each eyepiece when you hold the binoculars about 30 cm away from your eyes with the objective lenses pointed toward a bright light. The pupil in your eye can typically change from a minimum of 2 mm to a maximum of 7 mm. Where the exit pupil diameter is small (e.g. 8×20 binoculars 20÷8=2.5 mm, Figure 3) this will mean that in lower light levels everything seen through the binoculars goes dark as your eye can’t get enough light when the pupil gets larger than 2.5 mm. So, while they are easy to carry, small binoculars only really work in very bright environments.
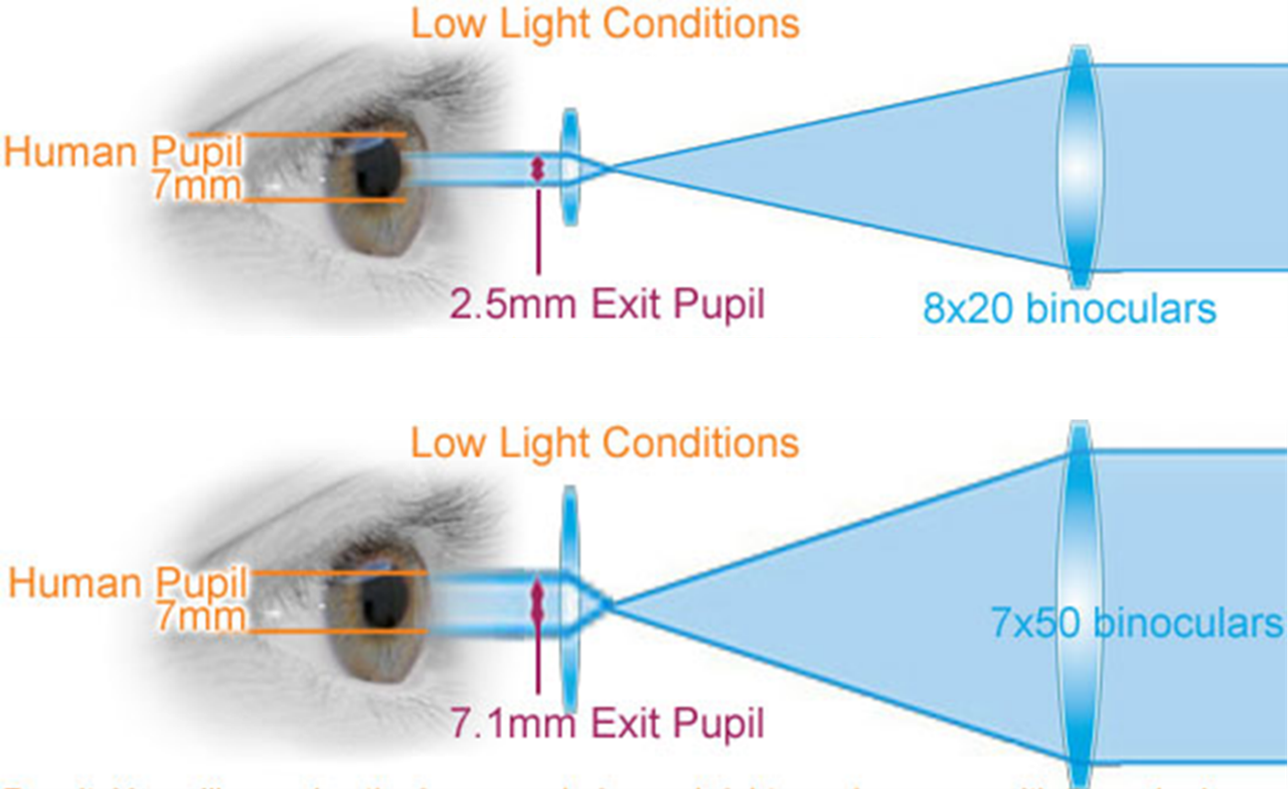
Figure 3: The consequences for you vision resulting from differences in exit pupil diameter for 8×20 and 7×50 binoculars
Weight and size of binoculars: binoculars with a larger objective lens are bigger and heavier than those with a smaller objective lens.
Photo by Georgie Tugwell
The cost of binoculars depends a lot on the type of coating that is put onto the lenses or prisms. The coating affects how much light gets through the lenses and into your eyes (Figure 4). The more expensive coatings transmit more light – a good pair of binoculars will transmit over 95% of the light that enters the binoculars through to your eyes. A cheaper pair might only transmit 50%. The more light you can get to your eyes, the lower the light levels that you will be able to use the binoculars in.
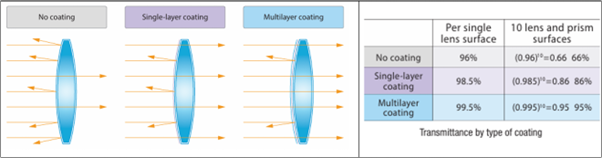
Figure 4: Effects of lens coating on the amount of light transmitted through a lens. Source: https://cdn-10.nikon-cdn.com/fileuploads/pdfs/sport-optics-imaging/Bino_Handbook.pdf
Are the binoculars sealed and waterproof? You need to spend enough money to buy binoculars that are sealed and filled with a gas like nitrogen so that no water vapour is present inside the binoculars. This is important because on cold mornings you don’t want water condensing on the inside of your lenses. If it does, you will have to wait until the binoculars warm up and the water vaporises before you can use them.
There are two basic designs of binoculars (Figure 5 Left and middle). The older design of binoculars used a pair of Porro prisms to lengthen the path of light making for shortened binoculars. This meant that the length of the binoculars could be reduced compared to simple straight binoculars. Porro prisms inherently provide a better depth of field/better stereoscopic 3D images because of the wider objective lens spacing. They are generally less expensive than roof prism binoculars, all other factors considered, as they are less technical to manufacture to high performance levels. Finally, Porro prisms offer a bright view from total reflection. But, the casing of the binoculars had to be made wider to fit the prisms in. More recently binoculars are shorter and lighter because of the way in which light is made to travel through a pair of roof prisms. Because of the more complex optical path (Figure 5 Right) the binocular tube can remain straight, and the binoculars are shorter and lighter than the older binocular design.
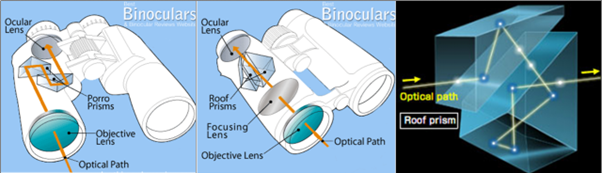
Figure 5: Left: Porro prism binoculars. Middle: Roof prism binoculars. Right: Light path through a roof prism
Setting your binoculars to your requirements:
Before using your binoculars you need to set them up for your own eyes!
1. Distance between ocular lenses and interpupillary distance: To set the binocular specifically for your eyes, first, as you’re looking through the binoculars, bend the barrels up and down around the pivot point (see 8 Figure 1) to adjust the distance between the two eye pieces (see 5 Figure 1) until the two images for your eyes merge into one circle.
2. Eye cups in or out: Most modern binoculars have eye cups that can be rotated in or out from each of the eye pieces (see 1 Figure 1). Whether they are rotated in or out depends on whether you wear glasses or not. If you wear glasses the eye cups should be rotated in (or on some binoculars the rubber ring around each eye piece should be folded back) to give you the correct eye relief. The distance between your eye and the eye piece lens is called the eye relief (Figure 6). If you don’t wear glasses the eye cups should be rotated out to increase the distance between your eyes and the eye piece lens. Eyeglass wearers can purchase binoculars with a longer eye relief (high eyepoint).
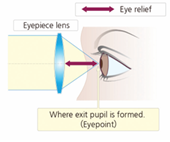
Figure 6: Eye relief
3. Adjusting for differences between eyes (diopter control): Virtually everyone has a strong eye and a weak eye. When you use binoculars, you need to correct for this, otherwise your eyes will feel strained, and you will find the image blurry. To correct for any difference between your eyes you need to find which one of the eye pieces on your binoculars has the diopter control on it (see 6 on Figure 1 and Figure 7). If you look closely, you will see that the diopter control collar has a vertical line on it and adjacent on the main body of the binoculars is a + . – symbol (or vice versa). To work out what sort of correction your eyes need you firstly need to set the diopter at zero. To do this rotate the diopter control collar until the vertical line is adjacent to the . of the + . – symbol.
Figure 7: Diopter control collar
Then, keeping both eyes open, cover the objective lens on the barrel of the binocular with the diopter control, and looking through the other binocular barrel at a nearby (5-10 m) object adjust the central focusing knob (see 3 in Figure 1) until the image is sharp. You now know that the central focus knob (which moves lenses in both barrels simultaneously) produces a sharp focus for the uncovered eye at that distance.
Now, still keeping both eyes open, move the cover on the objective lens to the barrel without the diopter (do not change your distance from the object). If your eyes were visually equal, the object should be sharp with this other eye since the diopter is set at zero. If not, turn the diopter control fully in both directions until this eye sees a sharp focus. This will change the lens position until it matches the sharp focus attained by the central focus knob for the other eye. Now look at the vertical line and see where it lies with respect to the + . – symbol.
Once done you don’t have to change this again, as long as the diopter control is in this established position, and your eye prescription does not change, the central focus knob will always give you a quick, sharp, strain-free view. Note: this process should be done even with eyeglasses as one does not know if your corrective lenses are still effective.
If you cant get this eye to focus with the diopter control then you may need to see an optician.
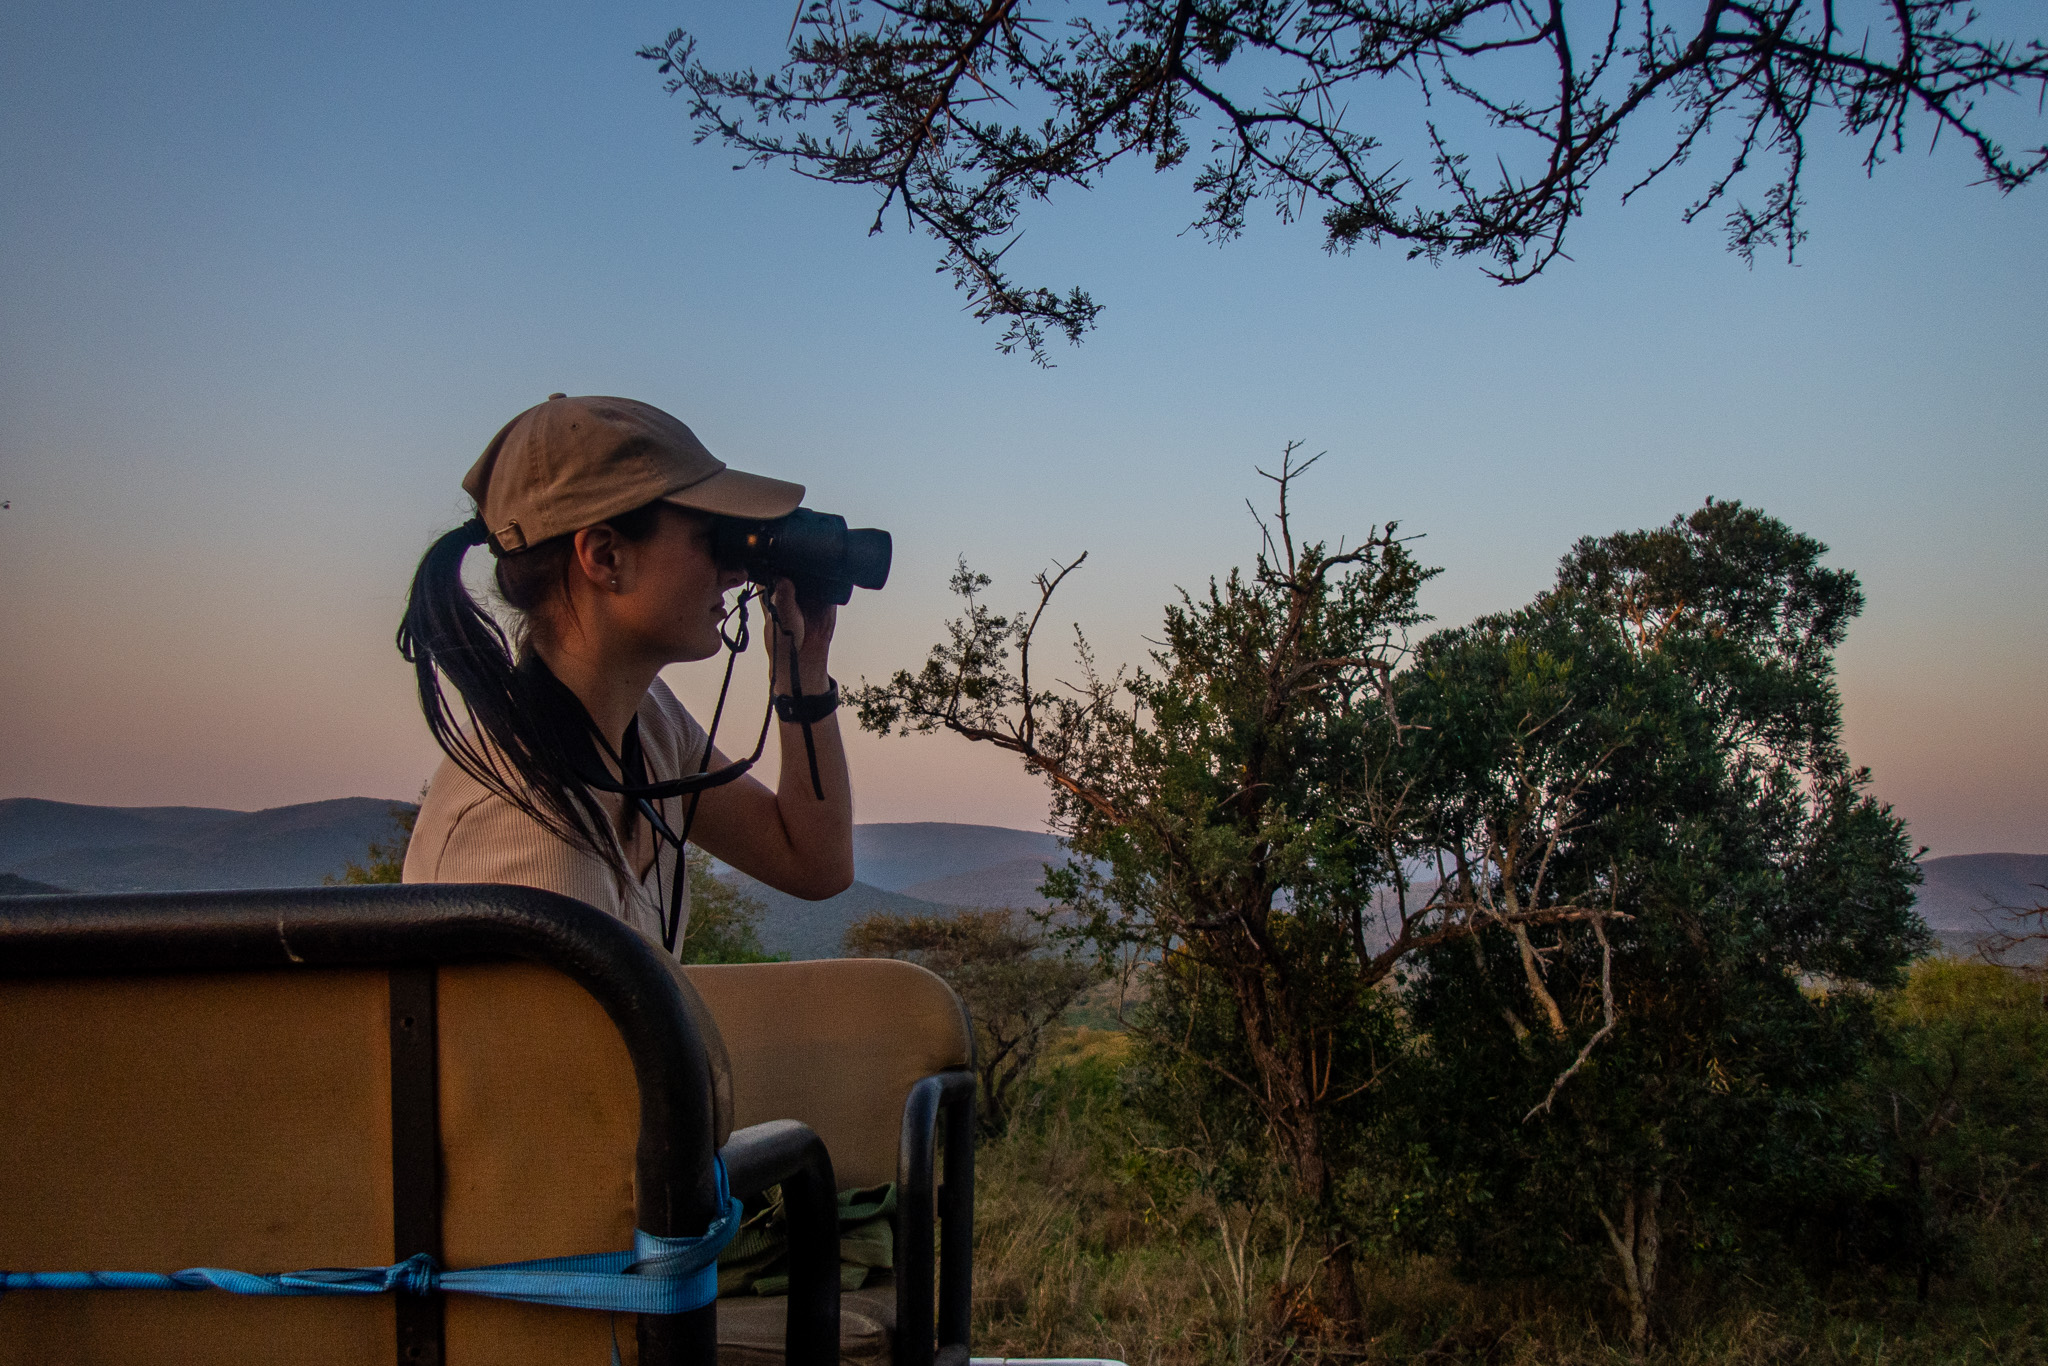
Photo by Callum Evans
How much money should I spend on my binoculars?
If you can afford to, then don’t waste your money on buying cheap binoculars – its not worth it as the quality of binoculars is typically closely related to the price. Aim for mid-range binoculars. That is somewhere between £150 (e.g. 8×42 or 10×42 Nikon Monarch M5’s) and £350 (e.g. 8×42 or 10×42 Nikon Monarch M7’s). AUD $ 300 – $700.
Title photo by Jack Hague


© 2026 Operation Wallacea Ltd. Website by Yello Media.
Social Media Links